1. With the Mint Yarn, crochet a chain of 4 stitches, join the first and last stitches with a slip stitch. You'll obtain a circle.
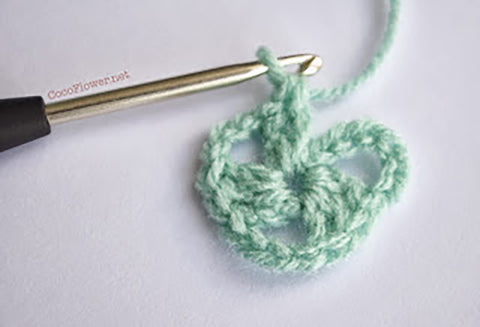
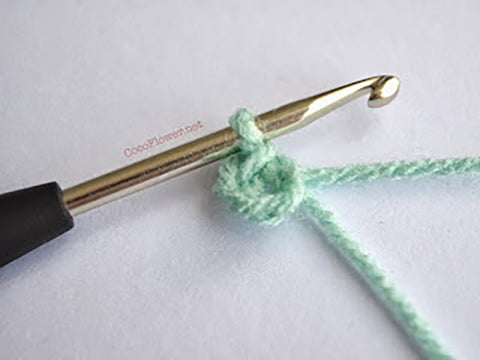 2. In this circle, crochet: 6 chains, 3 double crochets, 3 chains, 3 double crochets, 3 chains, 2 double crochets. Finish the round with a slip stitch into the 3rd chain from the beginning chain.
3. Color change (Yellow here). In the first space: 6 chains, 3 double crochets. Then 1 chain. In the 2nd space: 3 double crochets, 3 chains, 3 double crochets. Then 1 chain. In the 3rd space: 3 double crochets, 3 chains, 3 double crochets. Then 1 chain. In the starting space, 2 double crochets, slip stitch into the 3rd chain from the beginning chain.
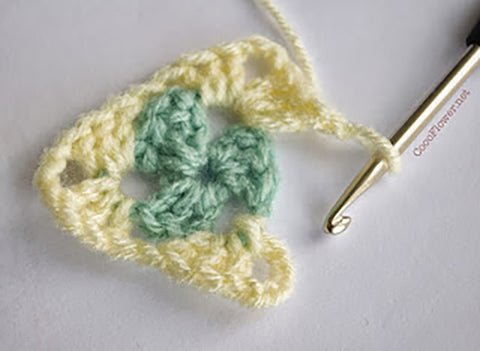 The round is complete.
4. Color change (Burgundy here). In the first space: 6 chains, 3 double crochets. Then 1 chain. In the 2nd space: 3 double crochets.
Then 1 chain. In the 3rd space: 3 double crochets, 3 chains, 3 double crochets. Then 1 chain. In the 4th space: 3 double crochets.
Then 1 chain. In the 5th space: 3 double crochets, 3 chains, 3 double crochets. Then 1 chain. In the 6th space: 3 double crochets.
Then 1 chain.
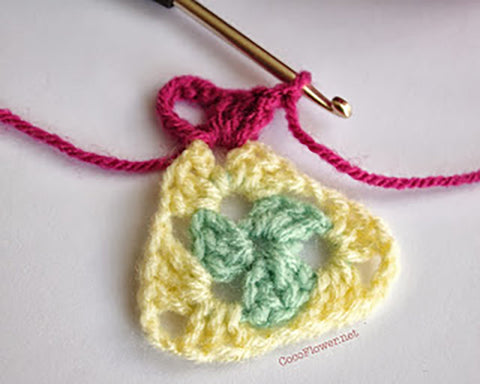 In the starting space, 2 double crochets, slip stitch into the 3rd chain from the beginning chain. The round is complete.
 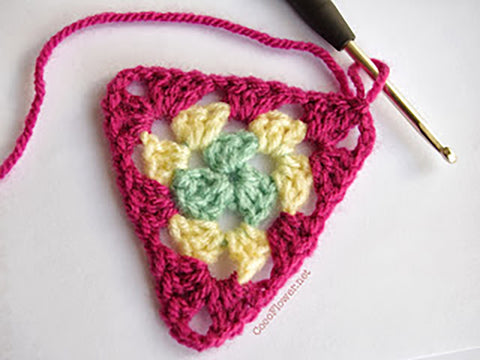 5. Color change (Dusty Pink here). In the first space: 6 chains, 3 double crochets. Then 1 chain. In the 2nd space: 3 double crochets.
Then 1 chain. In the 3rd space: 3 double crochets.
Then 1 chain. In the 4th space: 3 double crochets, 3 chains, 3 double crochets. Then 1 chain. In the 5th space: 3 double crochets.
Then 1 chain. In the 6th space: 3 double crochets.
Then 1 chain. In the 7th space: 3 double crochets, 3 chains, 3 double crochets. Then 1 chain. In the 8th space: 3 double crochets.
Then 1 chain. In the 9th space: 3 double crochets. Then 1 chain.
 In the starting space, 2 double crochets, slip stitch into the 3rd chain from the beginning chain. The round is complete.
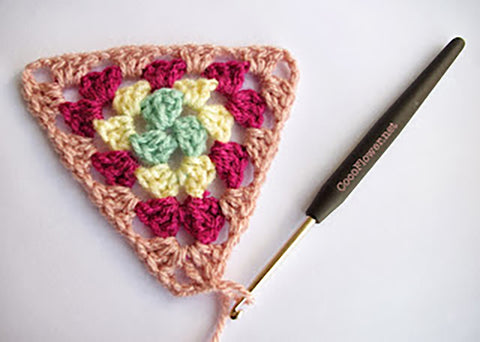
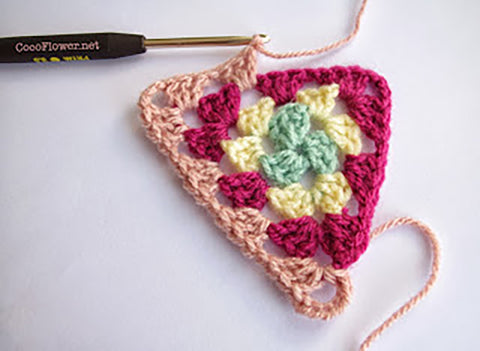
And there you have it, your first triangle is done! Bravo!
 Continue making more triangles following the same process, changing the color placement.
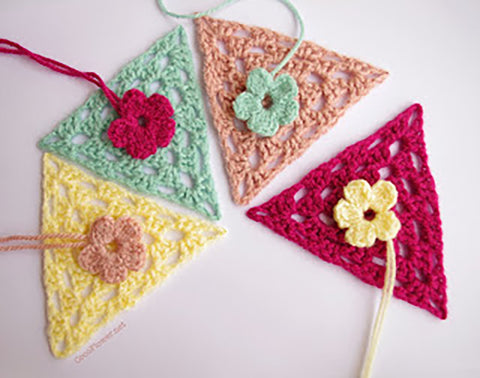
I also made 4 solid color triangles.
The idea is to add small flowers on them.
 THE FLOWERS:
- Make a chain of 4 stitches, slip stitch into the first stitch to close the ring.
-
Inside the ring, make 5 petals as follows: (1 chain of 3 stitches, 3 double crochets, 1 chain of 3 stitches, 1 slip stitch) repeated 5 times.

Sew the flowers onto the triangles.
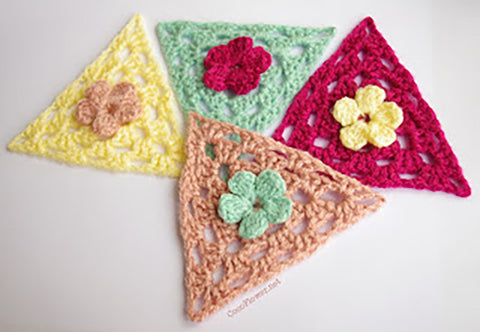 Press your triangles well, and arrange them in the order you want to assemble them.
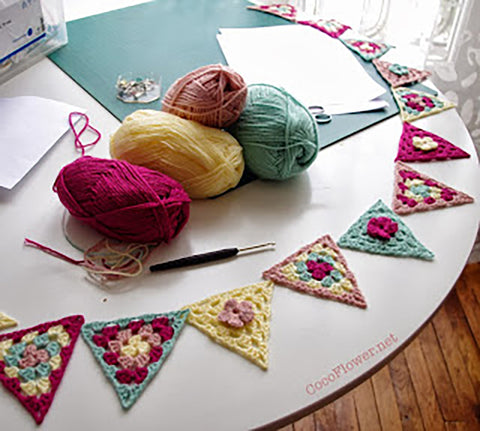
ASSEMBLY OF THE GARLAND:
To finish, with white yarn, make: A chain of 40 stitches.
Then a single crochet in each stitch of the first triangle.
Then 3 chains.
And a single crochet in each stitch of the 2nd triangle. And 3 chains, etc.
Continue until the last triangle. Finish with 40 chains.
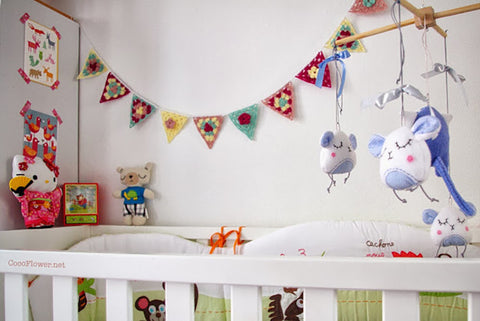
Congratulations! Your garland is now ready to be hung and brighten up your baby's room.
Stay updated on new DIY projects, artwork, promotions, and creative inspiration! Subscribe to CocoFlower's occasional emails. ♥
------------------------------------------------------------------------------------------
I'm delighted to offer you these free tutorials.
If you enjoy my content and want to support my artistic journey, I invite you to browse my Online Shop for more handmade treasures.
Every visit and purchase helps me continue doing what I love.
If you'd like to make a contribution, you can also support me on Buy Me a Coffee or Clic on the adds below.
----👇👇👇 Click on the ad to sprinkle some magic on my creative journey! 👇👇👇----
----❤️ Thank You. Your support helps me keep my DIY corner full of fun projects! ❤️----
------------------------------------------------------------------------------------------
These DIY tutorials are intended for personal use only. Reproduction, sale, or distribution of the items made with these tutorials, as well as selling the tutorials themselves, is strictly prohibited without my authorization. Additionally, the use of my text and pictures without permission is not allowed.
All patterns, explanations, and images are the property of CocoFlower and are protected by copyright law. All rights reserved.