Welcome to my DIY corner! I'm delighted to offer you these free tutorial: "DIY Crochet: Craft Your Stylish Mobile Phone case".
If you enjoy my content and want to support my artistic journey, I invite you to browse my Online Shop for more handmade treasures.
Every visit and purchase helps me continue doing what I love. If you'd like to make a contribution, you can also support me on Buy Me a Coffee. Happy crafting!


------------------------------------------------------------------------------------------
Explore my Crochet Phone Case DIY tutorial!
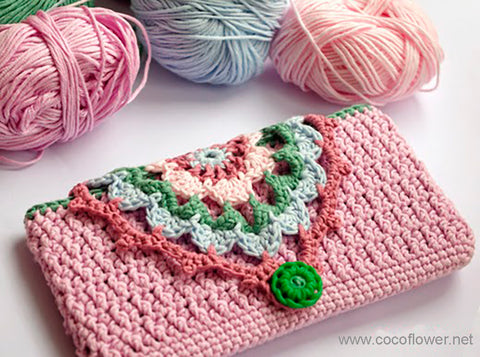
I'm thrilled to guide you through the process of crafting a stunning and functional phone case using the delightful art of crochet.
Embracing a colorful, shabby chic, and elegant style, this tutorial offers a unique opportunity to infuse your personal touch into your everyday accessory.
With just a handful of materials and a sprinkle of creativity, you'll embark on a journey to customize your phone case, transforming it into a reflection of your individuality and style.
Let's dive in and crochet something truly special!
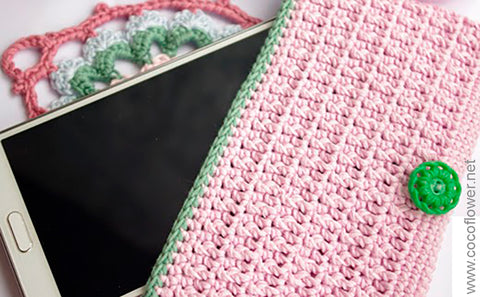
Material:
- Cotton yarn in four different colors: pastel Pink, dark Pink, Green, and pastel Blue
- 1 crochet hook size 3
- 1 cute button
- 1 wool needle
- Scissors
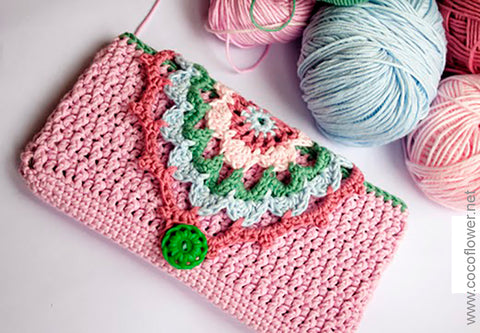
Step 1: Making the Case
1.1 - Make a foundation chain of the length of your phone case.
For example, for my Samsung Galaxy Note 3 phone, I made a chain of 35.
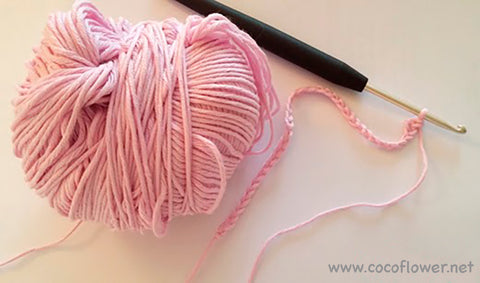
1.2 - Chain 1 and make 1 row of single crochet - In the last chain, make 3 single crochet. Then 1 row of single crochet in the back of the foundation chain. 1 slip stitch in the first chain.
1.3 - Chain 1 and make 1 row of single crochet - When you arrive at the end of the row, make 2 single crochet in each of the next 3 chains (we turn like that) - Then 1 row of single crochet - 1 slip stitch in the first chain.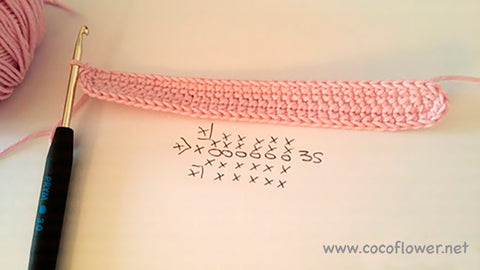
1.4 - Chain 1 - Make single crochet all around the fancy work - 1 slip stitch in the first chain.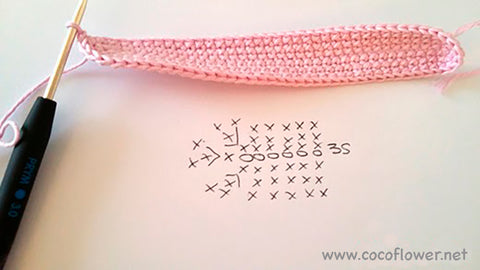
1.5 - Chain 3 - Make double crochet all around the fancy work - 1 slip stitch in the first chain.

If you like, you can make your phone case just with double crochet. I chose to make a fancy stitch.
Front post double crochet: instead of inserting the hook in the last chain of the previous row, you draw through the previous row in the double crochet (this video explains very well).
1.6 - Chain 3 - *(1 front post double crochet, 1 single crochet) - *all around the fancy work - 1 slip stitch in the first chain.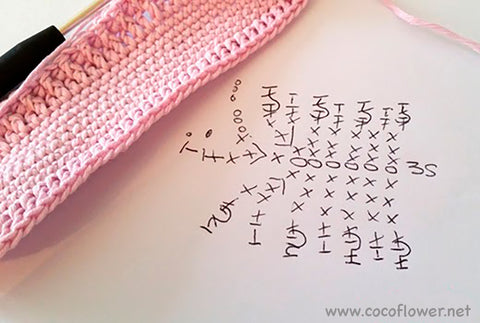
1.7 - Chain 3 - Double crochet around the fancy work - 1 slip stitch in the first chain.
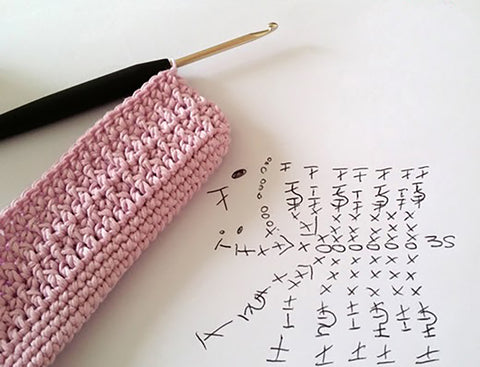
1.8 - Repeat steps 1.5 and 1.6 until you have the width of your phone.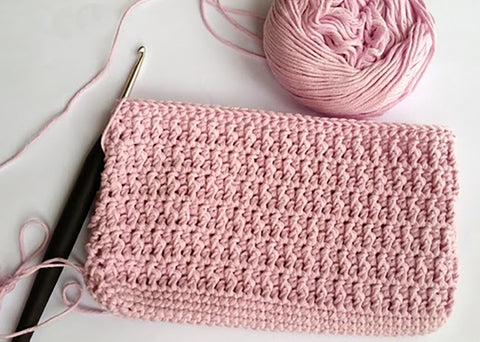
The case is done, now we make the doily.
Step 2: Making the Doily
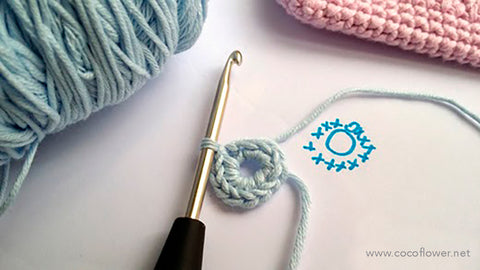
2.1 - Switch color (here Blue) - Chain 2 - Make 12 Single Crochet in the first Chain.
2.2 - Switch color (here Dark Pink) - Chain 5 - *(1 Double Crochet, Chain 2) in each of the 12 previous Single Crochet. 1 Slip Stitch in the first Double Crochet.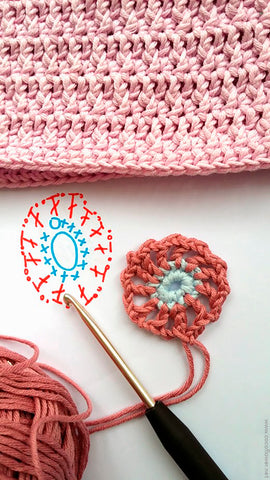
2.3 - Switch color (here pastel Pink) - Chain 3, 5 Double Crochet in the Double Crochet of the previous row, 1 Single Crochet in the next Double Crochet of the previous row then *(6 Double Crochet, 1 Single Crochet) in each Double Crochet of the previous row. You will have 6 petals.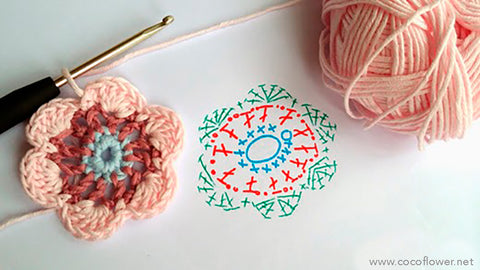
2.4 - Switch color (here Green) - *(begin on the Double Crochet number 2 of the previous petal - Chain 6 - 1 Single Crochet in the Double Crochet number 5 of the previous row) repeat * - You will have 12 Drops.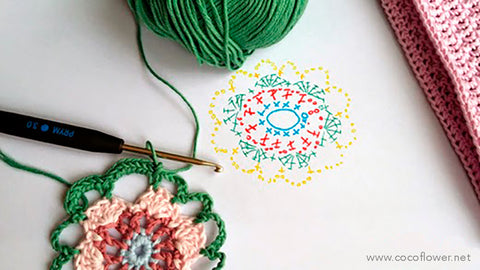
2.5 - Single Crochet in all the chains of the previous row.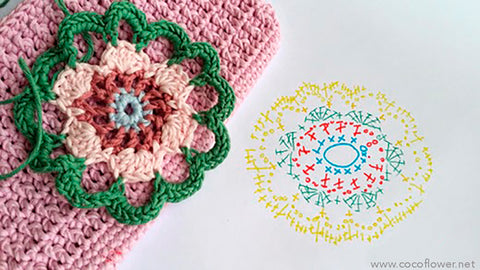
Step 3: Assembling the Case and Doily
3.1 - With pins, place the doily in the middle of the top of the case (here 4 drops will be attached to the case).
3.2 - Single Crochet on the case with the last used color (here Green).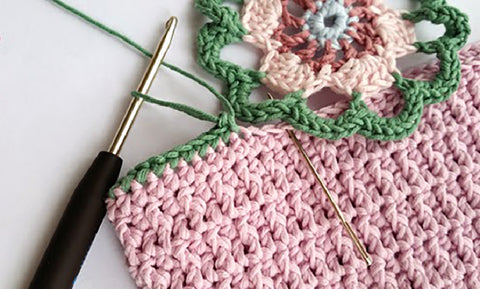
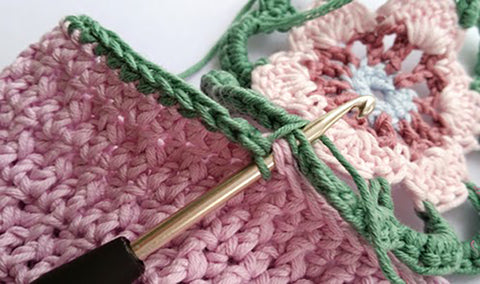
3.3 - Pass the crochet on the middle of the doily and make Single Crochet all around the case. Finish with a slip stitch on the first chain.
3.4 - Switch color (here Blue) - Pass your crochet on the case near the doily, and Chain 3, 1 Slip Stitch in the middle of the drop, 5 Double Crochet, 1 Single Crochet at the end of the drop then *(6 Double Crochet, 1 Single Crochet) repeat. You will have 9 petals.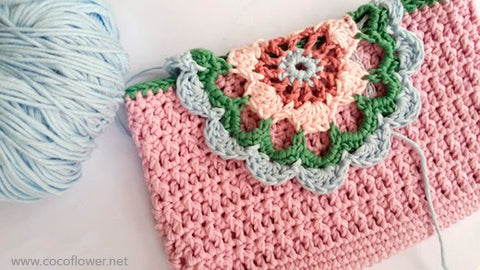
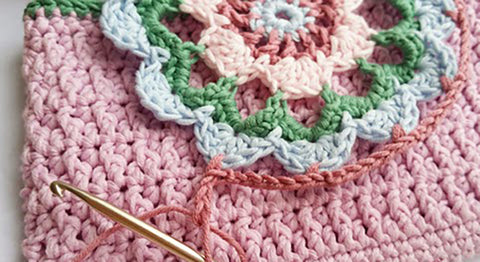
3.5 - Switch color (here Dark Pink) - Pass the crochet on the first switch of the case near the doily, then *(Chain 6, 1 Single Crochet in the middle of the petal of the previous row) repeat. You will have 10 loops.
How to make a Picot: Chain 3, slip stitch on the first chain.
3.6 - With the same color, make Single Crochet in each chain of the previous row. In the middle of each drop, make a Picot.
3.7 - Sew a button on the bottom of your case (on the Pink part) and make a chain between 2 drops to close your case.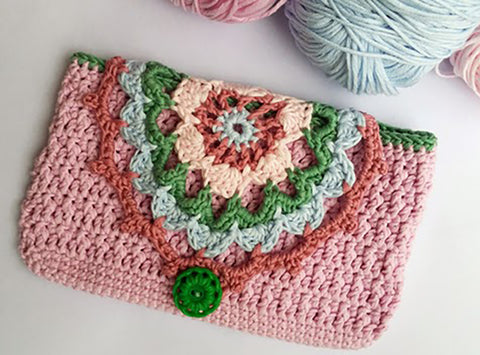
And there you have it – a beautifully crafted crochet phone case! I hope you enjoy making this project as much as I did.
Stay updated on new DIY projects, artwork, promotions, and creative inspiration! Subscribe to CocoFlower's occasional emails. ♥
------------------------------------------------------------------------------------------
I'm delighted to offer you these free tutorials.
If you enjoy my content and want to support my artistic journey, I invite you to browse my Online Shop for more handmade treasures.
Every visit and purchase helps me continue doing what I love.
If you'd like to make a contribution, you can also support me on Buy Me a Coffee or Clic on the adds below.
----👇👇👇 Click on the ad to sprinkle some magic on my creative journey! 👇👇👇----
------------------------------------------------------------------------------------------
These DIY tutorials are intended for personal use only. Reproduction, sale, or distribution of the items made with these tutorials, as well as selling the tutorials themselves, is strictly prohibited without my authorization. Additionally, the use of my text and pictures without permission is not allowed.
All patterns, explanations, and images are the property of CocoFlower and are protected by copyright law. All rights reserved.
